Monday, August 5, 2013

Something Salty Something Sweet


It is yet another Drill weekend, so my plan is to eat healthy! I don’t know about you, but eating healthy and being married to someone who is slightly obsessed with a deep fryer is not an easy task! So when he is gone I try to eat some healthy things. To most of you, this will not look like a meal, but maybe snacks. Well I am a snacking type of gal sooooo this actually kind of works for me.

First I will present you with carrot fries! No I did not even fry them! I don’t know if you shop at Costco, but omg the giant bag of carrots are insane! I mean I have made Curried Carrot Soup, Carrot Hummus, Beef Stew, and now Carrot Fries, and I still have a plethora of carrots! This is a very easy recipe, you just cut, toss and bake!


Look its so easy its all in the picture!
Unfortunately I do not know where this originated..  
 
This is how mine turned out!  
 
I would recommend trying to cut them thin, if they are too thick then it’s just like you’re eating a carrot, and who wants that? Watch your fingers, cutting carrots lengthwise can be tricky. When they were done baking I dipped them in a ketchup sriracha blend, I am mildly obsessed with sriracha…. They were a delightful snack that turned into my dinner… Were trying to save money so I am trying not to go to the grocery store, because when you go in to buy one thing... befor you know it you have a full cart and you are spending $100.... 

 
What’s for dessert you ask? Well I happen to have an acorn squash so I decided to roast it up. I also smothered it in this great buttery, sugary, spice blend…. Maybe not the healthiest thing, but at least its squash and not sticky buns… I cut the recipe in half due to only having one squash.  
This recipe and photo are from Mobile Bay Mag.com
 
Acorn Squash

2 acorn squash
1 cup brown sugar
1 cup honey
1/2 cup butter, melted but not clarified
1 teaspoon ground nutmeg
1 teaspoon ground cinnamon
1 teaspoon ground cloves


1. Preheat oven to 325 degrees.
2. Cut squash in half lengthwise and deseed. Cut squash in 1-inch slices (half-moon in shape). Place into greased pan.
3. Cover with sugar, honey and spices. Cook for 45 minutes or until tender.


This is how mine turned out, I bet it would look better if I put it in a bowl.
 

This was also a very easy recipe and I put some of the leftover butter goodness on bread… don’t judge! You will do the same thing!

 
I hope you like my attempt at being healthy! My view is that it is healthier then what I eat most nights, so I’m heading in the right direction. Thanks for stopping in! Any Questions or comments please let me know!         

Sunday, July 28, 2013

You can't go wrong with fried eggplant!


Those of you who know me, know that I do the majority of the cooking, but every now and then Zach prepares something. Trust me it is no ordinary meal… his specialties are creating feasts out of the leftovers, and grilling. He also loves his little fryer, and he will fry anything, and everything! If you only see the end result you will most likely enjoy is, but the real “charm” of him cooking is watching the proses he takes to create it. Someday I’ll try to record it so you can fully understand!


Some times dinner takes awhile...
 
Last night for an example, he started with cooking eggs over medium and put them at the bottom of the bowl, next he heated up some leftover rice and put it on top of the rice. He then grated a carrot (with a cheese grater) sautéed that with I think teriyaki sauce and topatillo, and I’m guessing garlic salt, put that on top of the rice. He then took the leftover roast cut it into slices and sautéed that with more teriyaki and put that over the carrots. I know I’m missing some of the other spices he used but that was dinner in a nut shell, and it was fantastic! This was not one of his more crazy concoctions, but it is the freshest in my mind.


So as you can imagine when he asked me to buy eggplant, because he knew this great eggplant dish I promptly went to the store and bought two! Then they sat in the refrigerator…and sat…and sat. Finally I decided to make something with them before they went bad. Today I bring you fried Eggplant!


Recipe courtesy Emeril Lagasse, 2003

Prep Time: 15 min

Cook Time:8 min

Level: Intermediate

Serves:2 servings as a side dish or appetizer


Ingredients

  • 1/2 cup all-purpose flour or cornstarch
  • 3 eggs, lightly beaten
  • 2 cups fresh bread crumbs
  • 1/2 teaspoon salt, plus additional for sprinkling eggplant
  • 1 tablespoon Essence, recipe follows
  • 1 small eggplant, cut crosswise into 1/4-inch thick slices and then quartered
  • Vegetable oil, for deep frying
  • Marinara sauce (optional)

Directions

Place the flour, egg, and bread crumbs each in 3 small bowls. Add the 1/2 teaspoon of salt to the egg and whisk to combine. Season the bread crumbs with the tablespoon of Essence and stir with a fork or your hands to thoroughly combine.

Dredge each piece of eggplant in the flour, coating thoroughly and then shaking to remove any excess flour. Coat each piece with the egg, then dredge in the bread crumb mixture, pressing to make the bread crumbs adhere. Transfer the eggplant pieces to a rack or to paper towels to let them dry slightly before frying.

In a deep, heavy skillet heat 1/2-inch of vegetable oil to 375 degrees F. Fry the eggplant pieces, in batches if necessary, for about 1 minute on each side, or until golden brown. Transfer with tongs to paper towels to drain. Sprinkle lightly with salt before serving. Serve with marinara sauce, or as desired.

Yield: 2 servings as a side dish or appetizer; 4 servings as an hors d'oeuvre.

Emeril's ESSENCE Creole Seasoning (also referred to as Bayou Blast):

2 1/2 tablespoons paprika

2 tablespoons salt

2 tablespoons garlic powder

1 tablespoon black pepper

1 tablespoon onion powder

1 tablespoon cayenne pepper

1 tablespoon dried oregano

1 tablespoon dried thyme

Combine all ingredients thoroughly.

Yield: 2/3 cup

Recipe from "New New Orleans Cooking", by Emeril Lagasse and Jessie Tirsch. Published by William and Morrow, 1993.


This is how mine turned out! I even got a little fancy and sprinkled with fresh Oregano 
 
This was a very easy recipe, a little messy because you have to dip it in three different things, but delicious!  I used panko rather than breadcrumbs, just because that is all I had. I recommend slicing the eggplant thin so it is almost like a chip, if they are thick then it will be gooey on the inside, which can be a turn off to some. I’ll admit that this was my dinner the other night… Hopefully someday I will try Zach's elusive eggplant concoction! 


Hope you like it! If you have any questions or comments please let me know! Thanks for stopping in!         

Thursday, July 11, 2013

Delightful Dinner Party!


I know I know! I have not been keeping up with posting… in my defense however, Zach is home safe and sound! Cross your fingers that he won’t have to leave again soon. Never fear, I have not stopped cooking!

This is from a few weeks ago when I had my fantastic cousins over for dinner! Lily is a Vegetarian so this meal had to accommodate her, and June is on a diet so I had to find something that wasn’t high in fat…

I chose to make Falafel! I’m sorry June I have no idea what the nutrition label would be for this one… It seems healthy enough though? I have however made this before and I know it is always a crowd pleaser for kids and adults alike! I found the recipe on Food Network (always a good go to web sight) This is one of Guy Fieri recipes.
 
This is Guy Fieri's Beautiful Photo of the Falafel
 
Falafel Recipe

Ingredients


  • 2 tablespoons canola oil, plus extra for frying
  • 1 medium yellow onion, chopped
  • 1 large red bell pepper, chopped
  • 5 cloves garlic, chopped
  • 2 (14-ounce) cans chick peas, drained
  • 1 teaspoon red chili flakes
  • 1 teaspoon ground cumin
  • 1 egg
  • 1 tablespoon salt
  • 1/2 tablespoon freshly ground black pepper
  • 5 tablespoons flour
  • 2 cups freshly chopped parsley leaves
  • 3/4 cup freshly chopped cilantro leaves
  • Pitas, for sandwich
  • Toppings: shredded lettuce and chopped tomato, sliced cucumbers
  • Yogurt Dipping Sauce, recipe follows

Directions

In medium skillet over medium heat, add 2 tablespoons oil and sweat onion and peppers 2 to 3 minutes then garlic and cook until translucent, about 5 minutes.

In a food processor, pulse together chick peas, red chili flakes, ground cumin, the egg, salt and black pepper to form a coarse consistency. Then add flour, parsley, and cilantro. Pulse until mixture starts pulling from the sides of the food processor.

Remove mixture to a large bowl and mix in the onion mixture. Chill falafel until ready to cook.

Roll falafel dough into 1-inch rounds. Then form rounds into an oblong quenelle shape, like a football.

In a thick-bottomed skillet heat 1/2 inch of canola oil over medium heat to 350 degrees F. Cook falafel balls a few at a time, until golden brown, about 5 minutes. Be sure to turn them so they do not burn or stick to the bottom of the pan. Drain on paper towels and sprinkle with salt while still hot.

Open the pita bread to make pockets. Place 3 to 4 falafels inside. Stuff with lettuce tomato and cucumbers and drizzle sauce generously on the inside. Serve immediately.
 

Yogurt Dipping Sauce:

  • 1 cup plain yogurt
  • 1/2 tablespoon lemon zest
  • 1 tablespoon freshly squeezed lemon juice
  • 1 tablespoon freshly chopped cilantro leaves
  • 2 teaspoons freshly chopped parsley leaves
  • 1/2 teaspoon ground cumin
  • Kosher salt, as needed

Mix the yogurt, lemon zest, lemon juice, cilantro, parsley and cumin together in a small bowl. Add salt to taste. Chill until ready to use.

My Falafel!                   

I would strongly recommend all the fixings and the yogurt sauce! I needed more flour then the recipe called for, but I also bladed it more then it needed to be blended... this is so good! if your in the mood to make some food, with out turning your oven on (but you need a fryer or skillet with oil) I strongly recommend this recipe! I think I am starting to drool just thinking about it!
 

A few posts ago I mentioned that I was a quest for a brownie recipe that is better than box brownies. If you’re looking for healthy this might not be the recipe for you, but if you looking for mouthwatering, cream your pants brownies then I would recommend this delightful recipe. Did I mention that they were better than the box mix? They are a little work intensive, but trust me it is so worth it! If you need help with making it or have questions I am here for you!
 
With out further a due, brought to you by Barefoot Contessa at foodnetwork
Recipe from the Barefoot Contessa 
Salted Carmel Brownies

Ingredients

  • 1/2 pound (2 sticks) unsalted butter
  • 8 ounces plus 6 ounces Hershey's semisweet chocolate chips
  • 3 ounces unsweetened chocolate
  • 3 extra-large eggs
  • 1 1/2 tablespoons instant coffee granules, such as Nescafe
  • 1 tablespoon pure vanilla extract
  • 1 cup plus 2 tablespoons sugar
  • 1/2 cup plus 2 tablespoons all-purpose flour, divided
  • 1 1/2 teaspoons baking powder
  • 1/2 teaspoon kosher salt
  • 5 to 6 ounces good caramel sauce, such as Fran's
  • 2 to 3 teaspoons flaked sea salt, such as Maldon

Directions

Preheat the oven to 350 degrees F. Butter and flour a 9 x 12 x 1 1/2-inch baking pan.
Melt the butter, 8 ounces of the chocolate chips, and the unsweetened chocolate together in a medium bowl set over simmering water. Allow to cool for 15 minutes. In a large bowl, stir (do not beat) together the eggs, coffee, vanilla, and sugar. Stir the chocolate mixture into the egg mixture and allow to cool to room temperature (see note below).
In a medium bowl, sift together 1/2 cup of the flour, the baking powder, and salt and add to the chocolate mixture. Toss the remaining 6 ounces of chocolate chips and the remaining 2 tablespoons of flour in a medium bowl and add them to the chocolate mixture. Spread evenly in the prepared pan.
Bake for 35 minutes, until a toothpick comes out clean. Don't overbake!
As soon as the brownies are out of the oven, place the jar of caramel sauce without the lid in a microwave and heat just until it's pourable. Stir until smooth. Drizzle the caramel evenly over the hot brownies and sprinkle with the sea salt. Cool completely and cut into 12 bars.
Note: You'll want to find true caramel sauce rather than dulce de leche, which has a lot of milk or cream added. Fran's can be ordered at franschocolates.com.
It is very important to allow the batter to cool before adding the chocolate chips, or the chips will melt and ruin the brownies.

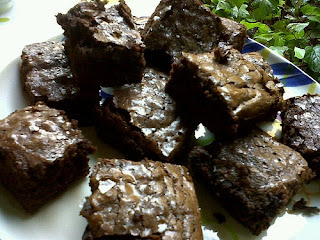
I didn't really drizzle... and we had to try it before I even thought about taking a pic
 
Mine did turn out fudgy, I think if I would have cooked longer if would have been more cake like. Honestly I don't really care, because they were still amazing! I did however make my own caramel sauce too, its cheaper and O so delicious! If you want to take that extra step and make your own caramel sauce here is the recipe! I made it while the brownies were in the oven.
 

Homemade Caramel Sauce

Makes approximately 14-16oz
  • 1 cup sugar
  • 1/4 cup water
  • 4 tablespoon butter
  • ¼ c milk
  • 1/4 teaspoon salt (optional, for salted caramel sauce)
Instructions:
  1. Poor sugar and water into a saucepan over medium low heat and whisk until sugar has dissolved.
  2. Once sugar has dissolved increase heat to high.
  3. At this point do not stir the mixture directly. Now and then, using the handle, give the pot a swirl to keep the mixture moving. The mixture will start to bubble after a minute or so. 
  4. After 3-4 minutes the mixture will turn from a light amber to medium amber and then finally to a darker brown, add the butter and milk. The mixture will bubble wildly. Whisk to combine (bubbles will subside upon cooling). Set aside to cool completely
I don't currently have a photo of my caramel sauce yet, but Ill post one next time I make it!

Hope you enjoy all the recipes today! If you have any questions or comments please let me know! Thanks for stopping by!


Wednesday, June 12, 2013

Beautiful Soup for a Beautiful Day


Today I went out of my comfort zone and joined a mommy and me work out group. I have been wanting to do it for a long time, but for some reason I always came up with reasons why I was “busy” or could do it. Finally it was time for me to start making new friends and try to get back into my old jeans! I found this group on meetup.com, there are more types of groups then you could ever imagine on there. I will admit at first I was hesitant… meeting up with a bunch of people I don’t know? But it was at a park in broad daylight… so I don’t think I was in a lot of trouble. It turned out great! The work out was short, but that was fine with me. I also met some really great moms and look forward to getting to know them. I was told by one mom that the zoo hosts a boot camp on Wednesdays, so I think I might check that out!

After that short work out I was motivated to do things around the house, cook, and play outside with Ivy and Chassi. I forgot how good if feels to work out in a group, and I definitely could use some more friends in the area as well!  I made the perfect meal for the day Curried Carrot soup! I of course found on Pinterest! 
This great photo and recipe are from  lot18

Ingredients: (serves 4)

  • 1 1/2 pounds fresh local carrots (these are from Origins Farm)
  • 1 medium or 1/2 large yellow onion, diced
  • 1T olive oil
  • 2T unsalted butter
  • 3 1/2 cups chicken broth (vegetable broth may be used for a vegetarian/vegan version)
  • 1/2 cup coconut milk
  • 1 1/2T ground curry
  • 1t salt and fresh ground pepper

Slice your carrots thinly and evenly, reserving a few of the carrot tops for garnish when you are ready to plate. Heat the olive oil and butter in a large soup pot over medium heat. Add the carrots and onion, stirring until coated and slightly tender, about 5 minutes. Add the chicken stock, coconut milk, curry, salt and pepper. Bring to a boil, then cover and simmer for about 15 minutes. At this point your house will start to smell amazing!

Once the carrots and onion are softened, remove them with a ladle to a blender. Pulse the blender to make thick-textured, creamy soup. Transfer the soup to a separate pot, reserving as you finish the rest in batches. Reserve the soup to be heated later, or continue by reheating.

Note: All of the broth does not need to be transferred to the blender — just make sure you do get all of the vegetables. Any broth that is left over can be used to cut the soup if it is too thick.

Soup should be served in individual bowls drizzled with 1/2 teaspoon of coconut milk, dotted with your favorite hot sauce, and garnished with the bright green carrot tops.
Here is my soup! It was even easy to make it look good! 
 

 I was so happy with how it turned out! I was very easy and didn't take much time or ingredients. I didn’t use the carrot tops due to mine not having them when I bought them. I also used a submersion blender so I wouldn’t dirty too many dishes, and I think it’s easier. Ivy even liked it, she sat next to me and we shared the soup, I am such a proud mom right now!  I think this would be a great soup to serve to guests, its not spicy and even healthy!
Thanks for stopping by! Any questions or comments please let me know, I will respond ASAP! If you have a Pinterest recipe you would like me to try, please feel free to let me know!


Monday, June 10, 2013

Stuffed mushrooms


Zach has been gone for over two weeks, on the plus side we only have two weeks left! We have defiantly been keeping busy! With discovering the Galt Market with My lovely cousin June, and the Claudius, where I found squash blossoms (recipe to come.) To going up to the moutons to escape the heat (109F) with my other lovely cousin Lily and Luke.
Ivy having way to much fun with Chassis leash, and the swimming hole!
 
 I have not been cooking, but making a lot of salads with random things around the house and shakes the last few days. 

Today with the temps in the 80s I can now think about being in the kitchen, without the fear of melting! I found this great recipe for Parmesan & Herbed Quinoa Stuffed Portobello Mushrooms. It sounded like the perfect earthy/ healthy meal I needed!
 Recipe and photo from E.A.T

      Ingredients:

  • 2 large Portobello mushrooms
  • 1 cup of prepared quinoa (after you cook the quinoa allow to cool and incorporate thyme, salt, pepper, and diced cucumbers).
  • Olive oil
  • Thyme sprigs and leaves
  • Salt & pepper
  • Parmesan cheese

Preheat oven to 400 degrees. Wipe your mushrooms with a damp paper towel to clean. Remove the stem, place on a baking sheet and drizzle mushrooms with olive oil. Sprinkle with a pinch of salt and pepper, then transfer the mushrooms to the hot oven to roast for 5-7 minutes.

Remove from oven and scoop quinoa mixture into the mushroom caps, add a pinch of fresh thyme leaves and grate fresh parmesan on top before returning to the hot oven and roasting for another 5 minutes or until the cheese is melted to your liking. I like to toss a couple whole sprigs of thyme onto the baking sheet at this point to use later for a garnish.

Remove and serve with that freshly roasted sprig of thyme.


 My yummy mushrooms! They look better in real life...

This was very easy! The hardest part was waiting for the quinoa to cook. I didn’t not have fresh thyme so I used my fresh oregano instead, and it was still delicious! I was also thinking that rosemary would be really good in it! I ate both mushrooms, so it might be a good appetizer, or pared with other food if you’re making it for guests.  The pictures on the website are really great too, they are what inspired me to make it! I just wish I grew the mushrooms myself. I really hope you like this recipe as much as I did!


Any questions or comments please let me know! If you find a recipe on pinterest you would like me to try first, don’t be afraid to ask!  

Sunday, June 9, 2013

Dog food and smoothies


I have been learning that I am not the best blogger! I don’t always have the motivation to sit down and write about what going on! On the pulse side however I still love to cook sooo I can still write about the wonderful world of Pinterest and some of the amazing edibles I find on there!

               I am not as big of a fan of cooking for myself, but a girls got to eat! With my plan to try and eat healthy I have been making a plethora of smoothies! They are delicious, nutritious, and most importantly quick and I can eat them while playing with Ivy!


               I am a mom who lets Ivy crawl around and explore, as long as she won’t get hurt. Today she found Chassi’s water bowl…
she thought it was sooooo much fun! Just splashing around and have a good ol time! Chassi however was slightly distressed, she would run to me and then back to the Ivy and back and forth.
 
 After the water was gone she moved onto the food bowl…
 
 Chassi was trying to eat her food quickly, but that didn’t stop the lil miss. She grabbed a handful of dog food and sucked on it for a while…
 
this is a girl who hates peaches… but likes dog food?  When she eventually spit it out Chas was right there to clean it up! At least we buy the expensive dog food right?

               The smoothie today claims that the fat will just fall off! Who wouldn’t want that?  All you have to do is blend together:

This is the vibrant green smoothie from The Beautythesis
Two handfuls of baby spinach

1 apple

1 banana

1 cup of yogurt

5 strawberries

 ½ and orange

 Mine was defiantly not as vibrant, I don't know if that is good or bad?
 
I didn’t have oranges so I used simply orange juice. It was very easy and tasted quite good! I would use a frozen banana so the drink is colder, but it my own personal preference. I don’t know for sure if this will make the fat melt off, but its good and obviously good for you!  
Thanks for checking it out! if you have any questions or comments please let me know! I will respond ASAP! If you have a Pinterest recipe you would like me to try please feel free to ask!

Monday, June 3, 2013

A trip to the Zoo and Brownies too


Today is day 6 of Zach being deployed, things are still running as usual. Chassi (my dog) is happy she gets to sleep in bed with me every night… To keep my mind off missing Zach we just try to stay busy!

Today my lovely cousin Juniper Invited Ivy and I to the Sacramento Zoo! This was Ivy’s first trip to the zoo and I definitely think she liked it! Well she loved watching little Claudia run around! I also had a great time hanging out with my cuz, it’s always a good time when we hang out! One of the great thing about going to the zoo, is that you walk all-around, which is great exercise that you don’t even realize you’re doing! You get to see so many cool animals, and you’re outside all day! This definitely needs to happen more often!

Claudia and Ivy
 
This evening I was craving something sweet! Trying to stay healthy and eating sweets is not always the easiest thing, and O man can I make desserts! I went to my trusted Pinterest for ideas… I found some really delicious ideas, but not so healthy… Then I stumbled on Jillian Michaels brownie recipe, she’s the guru of being fit! I might try her work out videos some day when she stops scaring me… I will admit I was slightly hesitant on this however, I love brownies, and I’ll be honest I think box brownies are the best! There are very few desserts that I think are better from a box, but as of now I still think box is best with brownies! That however did not stop me! I still wanted a healthy dessert!     

This was the image that popped up on Pinterest
 

Fudge Brownies

Ingredients

Olive oil spray for the pan

2/3 cup mild honey, such as clover or orange blossom

1/3 cup natural unsweetened cocoa powder

1/2 cup white whole-wheat flour

1/4 teaspoon baking powder

1/4 teaspoon baking soda

1/4 teaspoon salt

               1/2 cup unsweetened applesauce

               2 tablespoons olive oil

               1 large egg, at room temperature

               3/4 teaspoon pure vanilla extract

               Directions

1.      Preheat oven to 350F. Spray an 8-inch square pan with olive oil spray

2.      Place honey in a glass measuring cup. Microwave until honey is runny and just bubbling, 45 to 60 seconds. Add cocoa and stir with a fork until well combined. Let cool to room temperature

3.      Meanwhile, in a small bowl, place the flour, baking powder, baking soda, and salt. Whisk until well combined.

4.      In a large bowl, combine the applesauce, oil, egg, and vanilla. Whisk together until well blended. Add the honey- cocoa mixture and whisk until smooth. Add the flour mixture to the liquid mixture and stir until no traces of flour remain. Scrape the batter into the prepared pan.

5.      Bake until the surface looks dry around the edges of the pan and a toothpick inserted in the center comes out with moist crumbs clinging to I, about 25 minutes. Do not over bake. Place the pan on a cooling rack and let cool completely before slicing into 16 squares. (Store the brownies in an airtight container at room temperature for up to 3 days.)
Here is my result ( this was taken a few days after they were made) 
 

         When they came out of the oven I was excited to try them! I’ll be honest not my favorite… I only had normal honey so they had a very strong honey flavor! The texture was also odd… I don’t really know how to explain it, not fudgy but not fluffy either. And not that perfect fuggy fluffy texture you want from a brownie… a weird spongy texture I guess. I will not be trying this recipe out again! But with cooking you always find things you don’t like, but that means I am now on a hunt to find a brownie that can compare with the box!

*They did get a bit better the next day, and I did not refrigerate.

       Thanks for stopping by! I’ll keep you posted on the elusive brownie hunt! Please feel free to leave any questions or comments, I’ll make sure to get back to you ASAP!  

Friday, May 31, 2013

It's a Power Muffin kind of Day


Today is day 4 of Zach being gone. It is starting to feel longer than just a drill weekend… but we have be apart longer so this is nuthin right? I was hoping to post a post every night… not doing as well as I hoped. Ivy is all about the early mornings, and I am all about trying to nap… “Trying” is the key word. Like most however we just keep on keeping on.  

Today is a bit gloomy so during Ivy’s nap I decided to cook! I’m beginning to realize this blog is more about cooking and less about the other mog pog of things I was originally thinking. The photos I take of my food are not artsy or designed to make the food look perfect. I want to show what it will probably look like to the average cook. But I will put the pictures that inspired me so you also can get inspired!

I am very addicted to Pinterest right now, so I am trying to eat healthy using Pinterest inspired recipes! Please feel free to request a recipe of you would like me to take the plunge first!

Today’s recipe is brought to you by Domesticated Academic
 

Power Muffins

Makes 12 regular muffins (depending how full you pack your muffin tin)

Ingredients

  • no-stick cooking spray or muffin liners
  • 2 cups all-purpose flour
  • 1 cup oats–quick or regular oats, plain
  • 2/3 cup sugar
  • 1 teaspoon baking powder
  • 1 teaspoon baking soda
  • 1/2 teaspoon salt
  • 12 ounces honey nonfat greek yogurt or 1 1/2 cups (Chobani)
  • 2 large eggs, lightly beaten
  • 4 tablespoons unsalted butter, melted and slightly cooled
  • 1 teaspoon vanilla extract
  • 1 cup fresh blueberries


  1. Heat oven to 350°.
  2. Coat muffin tin with cooking spray or liners.
  3. Combine flour, sugar, oats, baking powder, baking soda and salt in a bowl.
  4. Combine yogurt, eggs, butter, and vanilla in a second bowl.
  5. Fold yogurt mixture into dry mixture; stir to combine completely.
  6. Gently fold in blueberries.
  7. Spoon into muffin tins.
  8. Bake until top is golden and springs back when you gently touch it, 20-25 minutes
 
    My power muffins!

I found this recipe to relatively easy and delicious… I do however eat more than one in a single sitting… I love muffins, but I have a hard time knowing how much batter to put in each section. They always either way to low or overflowing, but with the batter being thicker than usual I was able to make them almost perfect.. With a few low ones. If you want a healthy muffin that’s not to sweet this is a great recipe! If you’re a person who’s not a fan of blueberry’s don’t be afraid to substitute a different berry!

Thanks for joining! Any questions or comments please let me know!       

Babys love salad!


Today is day 3 of Zach’s deployment, my day today was not very eventful. It turned into a late night last night and Ivy thought it would be great fun to wake up at 5am…. I’m trying to drink green tea rather than coffee, due to all of the extra health bonuses… which left me with a lovely headache..

After my power nap I did feel slightly livelier, so I put Ivy in the Baby Bjorn and put the leash on Chassi and we went for a nice stole around the neighborhood. Being outside always makes me feel better, I forget that some times. I really think we need to go on a camping trip! It has been way to long!

I planted my tomato plant today in that Topsy Turvy thing,

 I sure hope it works! You may be asking yourself why I don’t plant it in the yard, because I do have a yard now. Chassi (my dog) is a pit of a digger and if she want that plant it doesn’t stand a chance! So at the moment while she’s learning how to be in a yard, my tomatoes are going to have to try and grow upside-down. I also planted my rosemary seeds today in a mason jar. When they start growing I think I’ll trans plant them in the front yard. I will also take pics when its more then dirt in a jar. 

For my dinner tonight I found this great recipe on Pinterest   


Photo from The Diva Dish
Lemon Quinoa Cilantro Chickpea Salad

Ingredients:

1 Cup dry quinoa

2 Cups Vegetable broth

2 Cups spinach

½ a bunch cilantro

1/4 Cup onion

2 cloves garlic

1 can garbanzo beans (drained and rinsed)

1 ½ Cup cherry tomatoes cut in half

2 avocados diced

Dressing:

Juice of 2 lemons

2 teaspoons dijon mustard

2 Tablespoons olive oil

1 teaspoons agave nectar

1/2 teaspoon cumin

salt and pepper to taste


Directions:

1.     Make your quinoa first. Turn on the heat to medium high and let the quinoa come to a boil. Once it boils, reduce heat to medium/low and let quinoa simmer. Stir every so often, and cook quinoa for about 20-25 minutes just until the liquid absorbs. You don’t want it completely dried out, so when there is just a TINY amount of liquid left in the pot, remove it from heat and put a lid on it. Set it aside, and make the rest of the salad.


2.     In a food processor, add spinach, cilantro, onion, and garlic cloves  


3.     Process until they are finely diced. You can do this by hand as well if you don’t have a food processor.


4.     Add to a bowl, next add your chickpeas and stir until everything is combined and coated. If the quinoa is cooled, you can add it to the chickpea mixture.


5.     Make your dressing by whisking all the ingredients together. Pour over salad, and mix until combined. Add in tomatoes and avocado and mix. Set in fridge for about 10-15 minutes before serving so the flavors set.


 I was going to take a nicer pic but Ivy really wanted to be in it!


I thought that this was a delicious salad, and very healthy! Ivy seems to like it too! It took a little bit of prep time, and if you don’t have a food processor it will take much more, but it is very refreshing for the summer. I was also surprised by how quickly it filled me up! It can sometimes take a lot to fill me up, I mean I’ve been known to eat a whole box of cheez-itz in one sitting…

Thanks for visiting! If you have any questions or comments please let me know! Or if there is a recipe you would like me to make, don't be afraid to ask!